TS Plus Installation
Prerequisites
Before installing TSplus Remote Access, please check the prerequisites list.
Server side
- OS: Microsoft Windows versions 7 to 11 or Windows Server 2008R2 to 2022 with at least 2GB of RAM.
- TSplus does not support installation of Remote Access on Windows Home Editions.
- The operating system must be on the C: drive.
- Java Runtime Environment. If Java is not already installed, Remote Access will install OpenJDK during setup.
- If using a Windows Server OS, be sure that the TSE/RDS and TSE/RDS Licensing roles are not installed.
- Your Remote Access server must have a static private IP address.
- For External access, your server must have a static public IP address or dynamic DNS provider.
Client side
- OS: Microsoft Windows versions 7 to 11 are fully supported.
- For MacOS you can use any Mac RDP client or the TSplus HTML5 client.
- For Linux you can use Rdesktop or the TSplus HTML5 client.
- A PDF reader (example: Foxit Reader or Acrobat DC)
More info about prerequisites »
Download the TSplus Remote Access 15-day trial and run the Setup-TSplus.exe program on the system you decided to use as the Remote Server.
Then follow the installation steps and wait until the program asks you to reboot.
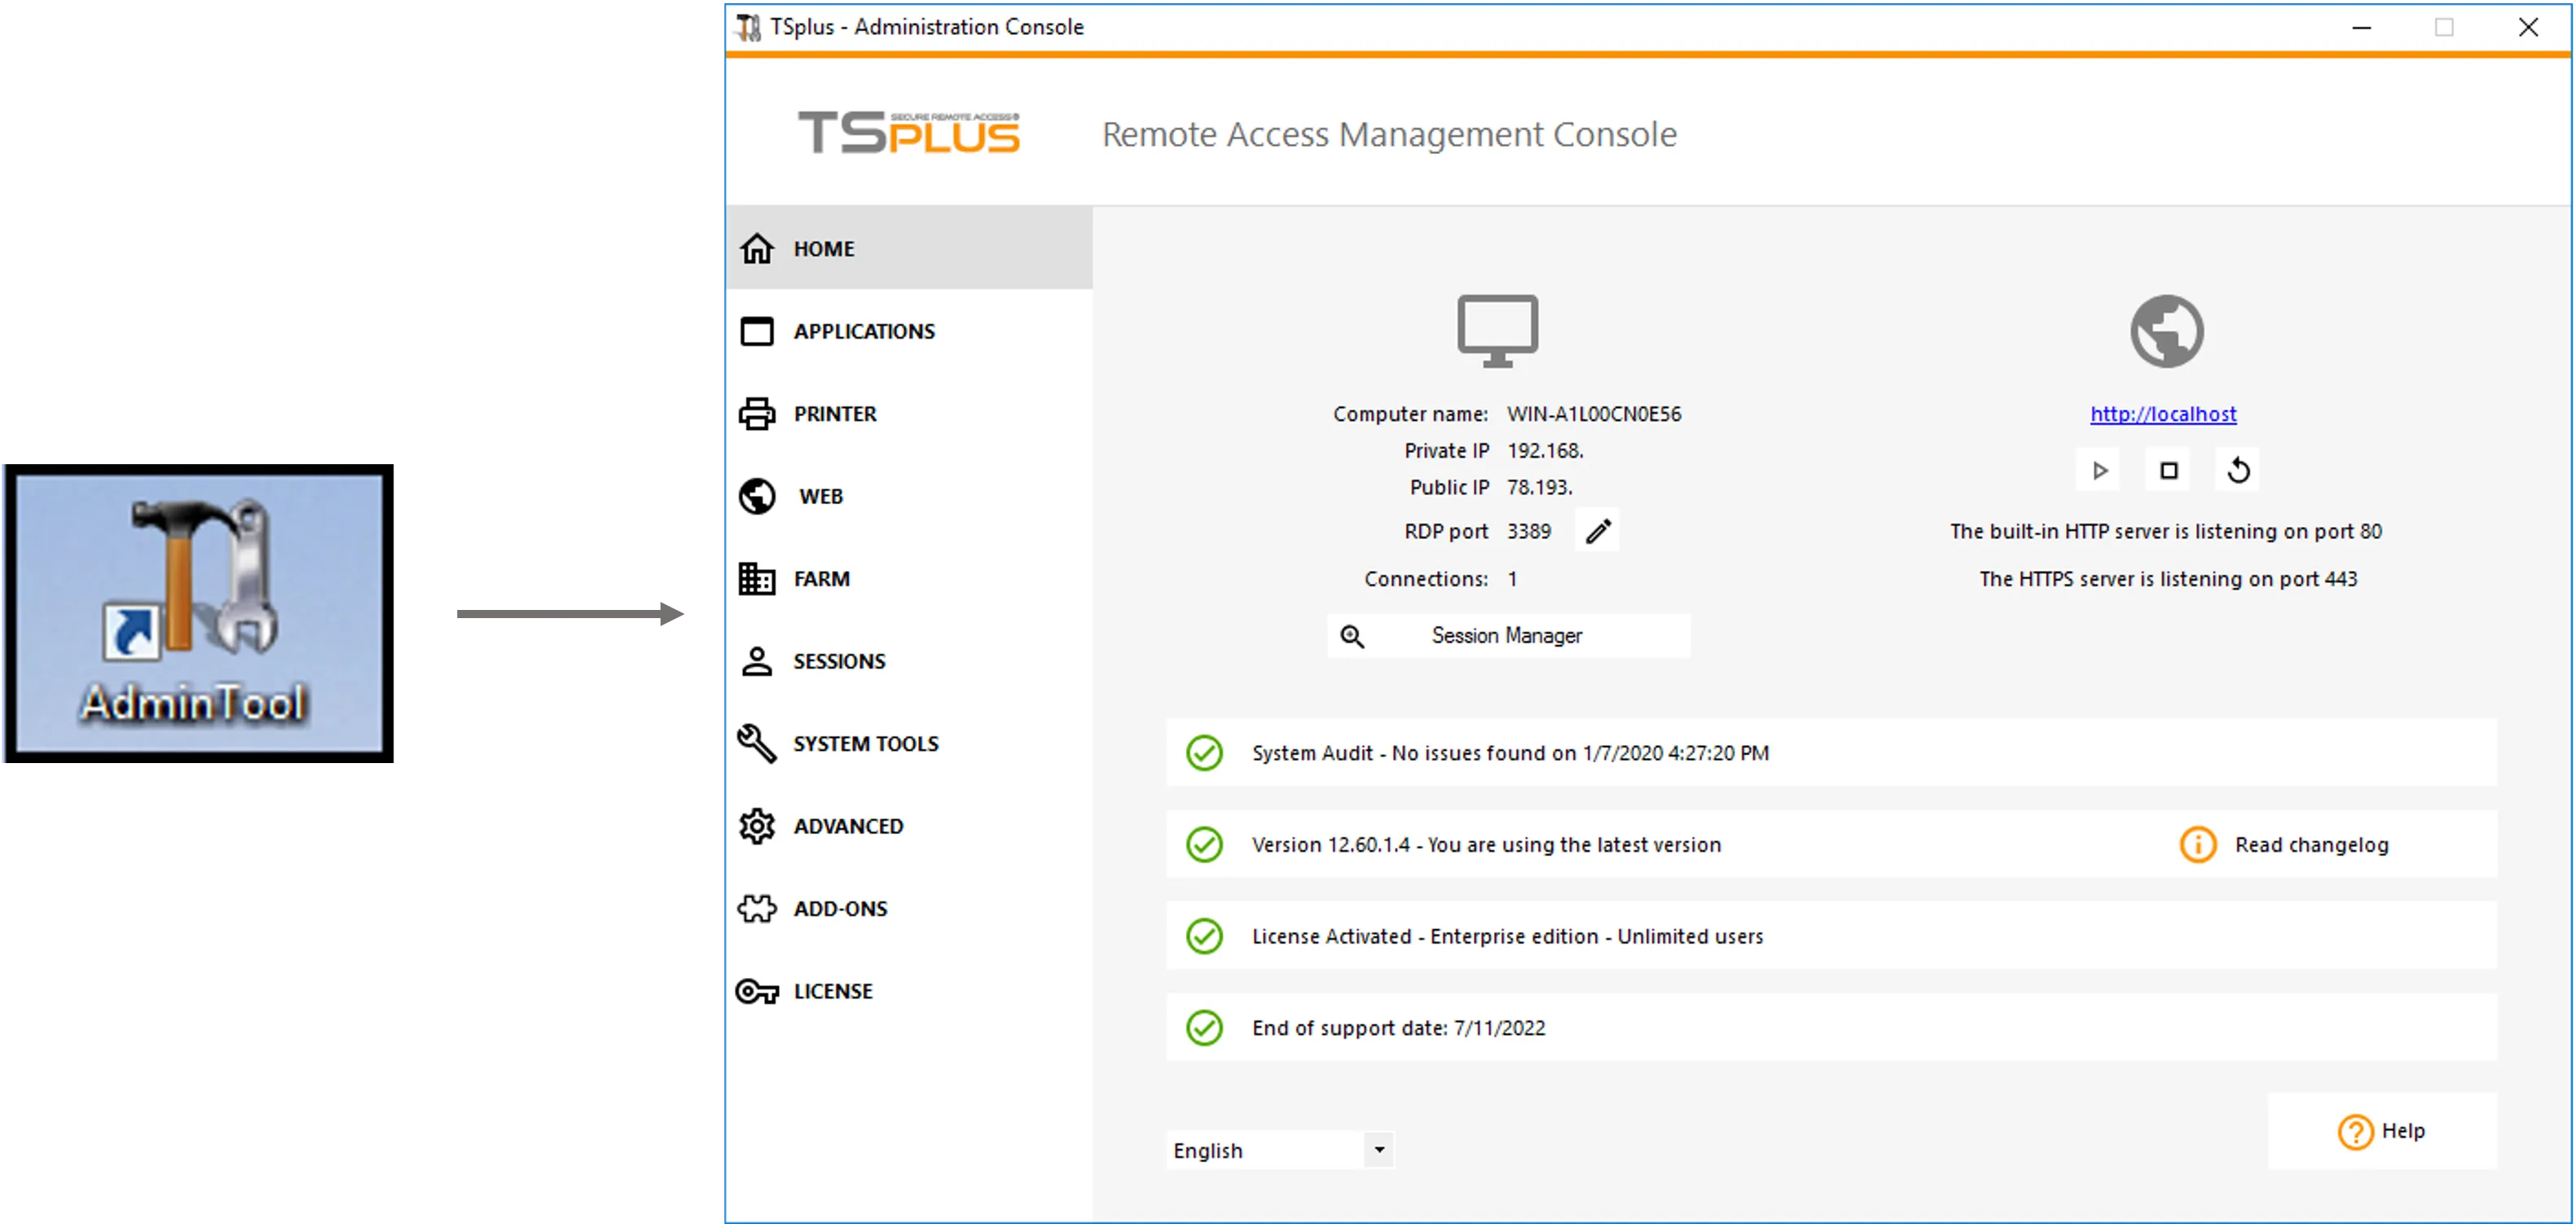
After the reboot, you will see 2 new icons on your Desktop, including the Admin Tool icon:

Configuration
This section will help you configure a basic TSplus Remote Access environment.
To go further and explore advanced features and the customization of your installation, please visit the full user guide »
Publish applications
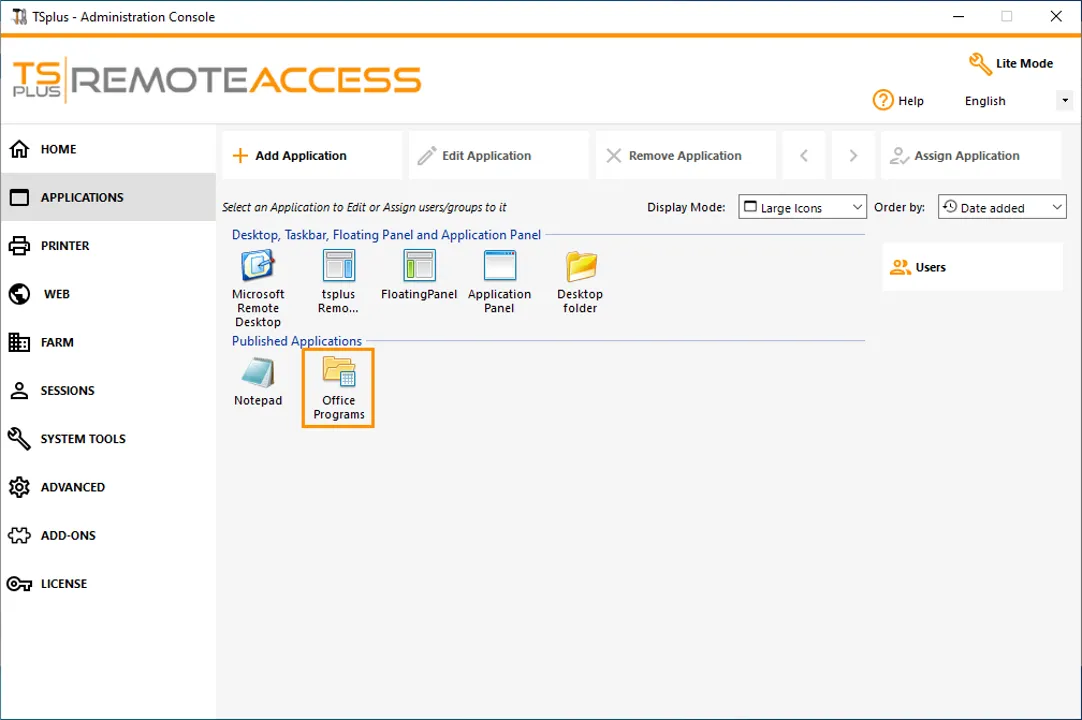
Add, edit or remove applications by clicking on the "Applications" tab -> "Publish" in the Admin Tool.
More information here »

Assign applications to users/groups
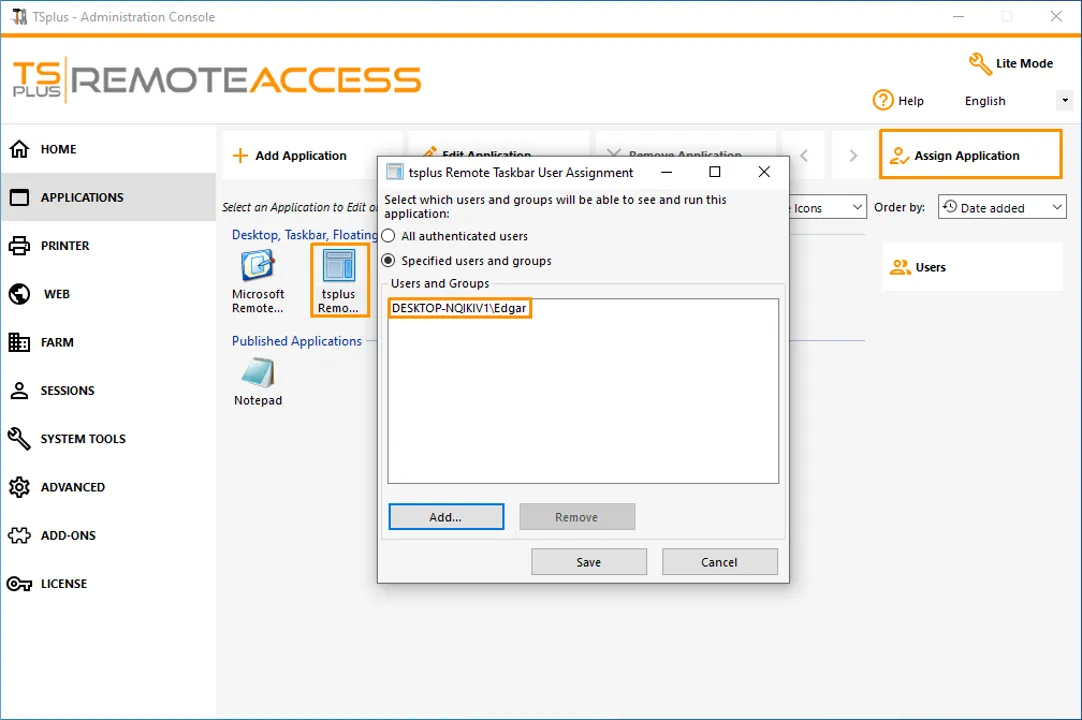
In the Remote Access Admin Tool (Lite Mode or Expert Mode) you can assign application to users or groups using the Active Directory, Azure, AWS and local accounts.
- You can assign one application to one user, only they will see this application.
- You can assign application(s) to several users or groups.
- You can also publish a full Remote Desktop.
More information:
Choose how users will connect
Remote Access is compatible with Windows Remote Desktop Protocol. Any user can connect locally or remotely with a standard Remote Desktop Connection client (mstsc.exe) or any RDP compatible client. To fully benefit from the advanced features in Remote Access (Seamless client, RemoteApp, Universal Printer…) you can use a generated client or the Remote Access Web Portal.
There are multiple connection options for your users:
- Classic Remote Desktop Connection (MSTSC.EXE).
- Portable TSplus RDP client which will display a windowed environment for your remote connection that you can minimize in the Windows taskbar.
- TSplus Seamless client which will only display applications and no desktop.
- MS RemoteAPP client which will display application using the native MS RemoteApp.
- Windows client over the TSplus Web Portal.
- HTML5 client over the TSplus Web Portal.

Make your server remotely accessible
In order to access your TSplus server from a remote location, you will have to create a port forwarding or port redirection rule for the 3389/80/443 ports depending on your preferred connection method.
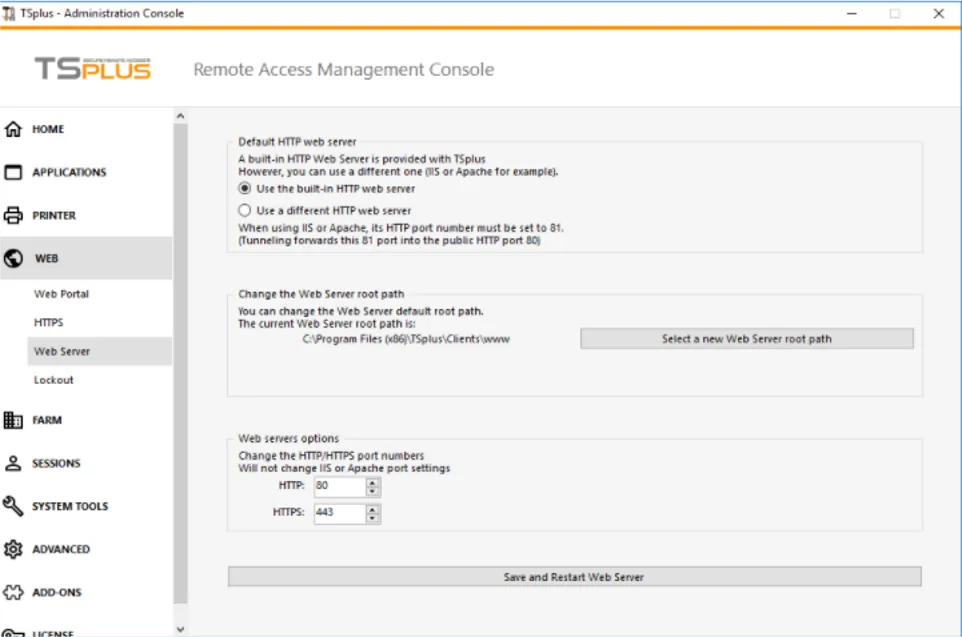
You can change the RDP port on the Home tab. And the 80/443 ports can be changed on the Web Server tab.
WEB > Web Server > Select “Use the built-in HTTP web server”

For example, run the above command to disable the license on your installation providing your license key.
Related Articles
How to Update Acronis Backup Agent ?
Local: On each machine download the installation package and run it. Installation package detects the installed components Web: From the web interface you will see the warning sign on the Updates pane, where you select the agents to update and click ...How to Install Acronis Backup Agent on Windows Server ?
Once you place an order for the Acronis Backup solution, you will receive an email on your registered email ID from Acronis. Kindly follow the instructions in the email for setting up the password of the Acronis console. Once you have set the ...How to delete agent?
To completely remove an Agent: 1. Unregister it from the Backup Management Server (Delete button in the web console) 2. Uninstall the agent from the machine (locally on each machine) When user confirms, the following happens: − Machine is ...