VM Creation
Overview
This guide shows you how to create a VPS in Virtualizor. Its a general guide and doesn't take into account the differences in Virtualization technologies like OpenVZ, Xen, XenServer, Proxmox and KVM.
This guide shows you how to create a VPS in Virtualizor. Its a general guide and doesn't take into account the differences in Virtualization technologies like OpenVZ, Xen, XenServer, Proxmox and KVM.
To Create A Vps
Go to "Virtual Servers -> Create Vps"
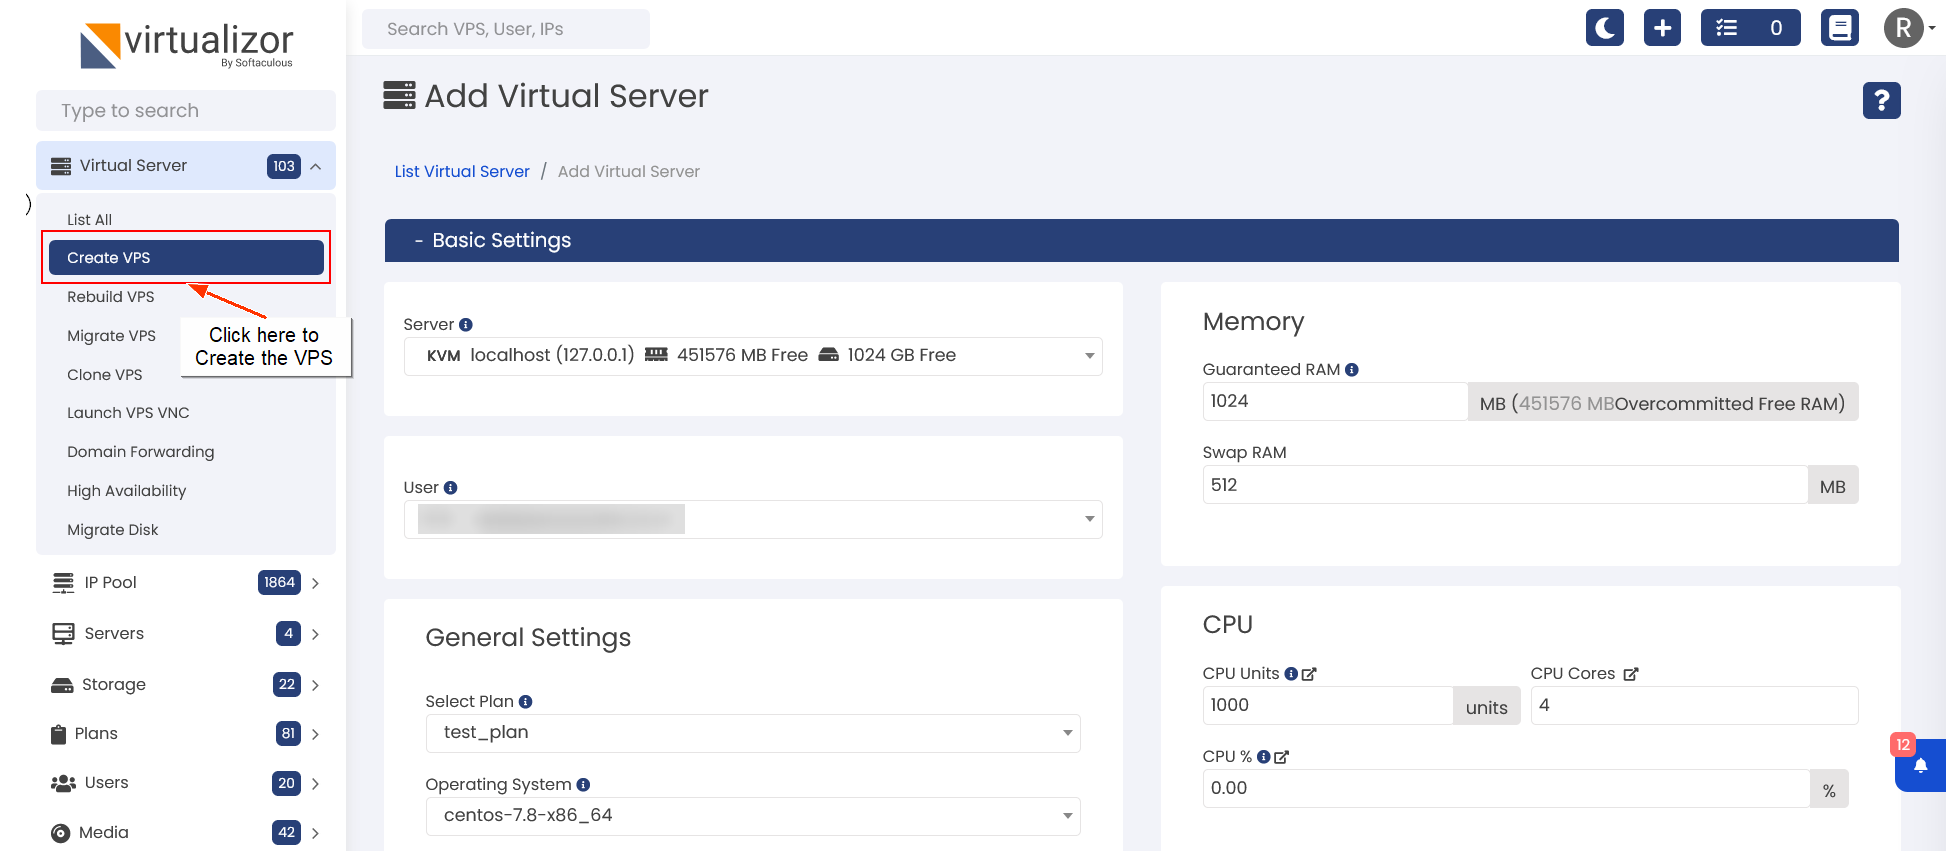
In Create VPS you can find 2 sections
1. Basic Settings
2. Advanced Options
Go to "Virtual Servers -> Create Vps"
In Create VPS you can find 2 sections
1. Basic Settings
2. Advanced Options
Basic Settings
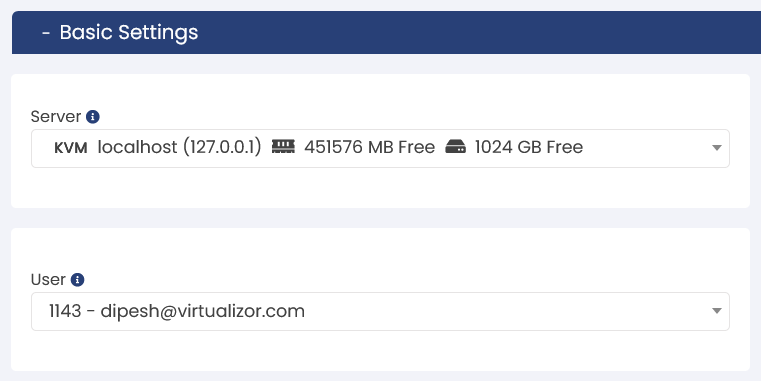
| Name | Description | Supported Virtualization |
| Server | In server you can select the server through which you can create the VPS like KVM, Proxmox ,Openvz, etc. | All |
| User | In User you can select the user to create the VPS for. This user can manage the VPS from Enduser panel. | All |
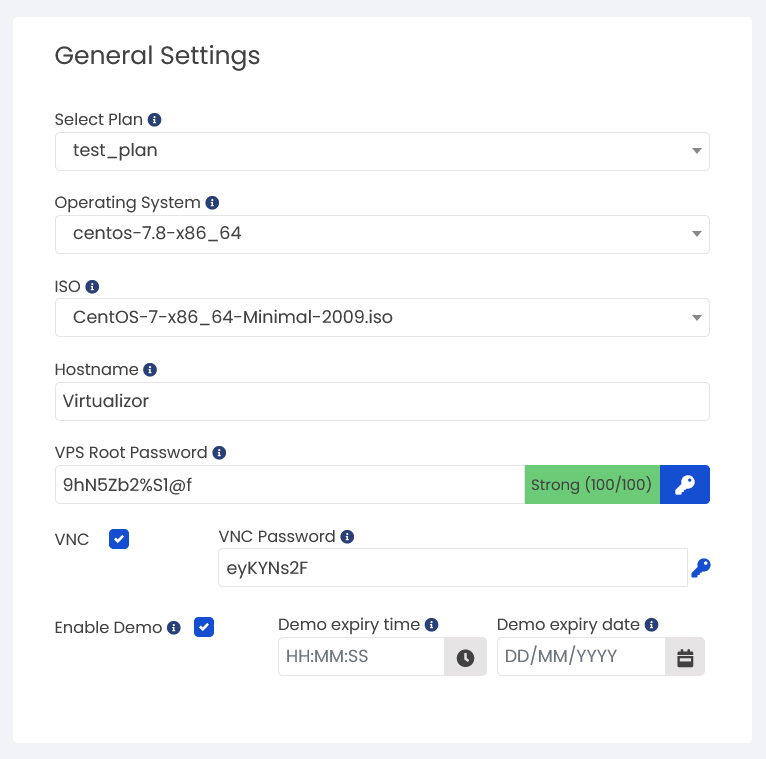
| Name | Description | Supported Virtualization |
| Select Plan | In the plan selection process, you can choose a predefined plan that aligns with your requirements. This eliminates the need to manually enter individual values each time. By selecting a suitable plan, you can streamline the setup process and ensure consistent configurations. | All |
| Operating System | Choose an operating system (OS) allows you to select an OS that aligns with your specific requirements. By selecting an appropriate OS, you can ensure compatibility, utilize desired features and tools, and create an environment that best suits your applications and workflows | All |
| ISO | (Optional) Selecting an ISO file during VPS creation allows for customized installation of specific operating systems or software, providing flexibility, access to the latest releases, and the ability to install specialty or custom configurations. | All |
| Hostname | Setting a hostname during VPS creation provides a unique identifier for your virtual server, aiding in identification, accessibility, organization, and network communication. | All |
| Vps Root Password | During VPS setup, you can set a password for the root/administrator account. It is recommended to use a strong password generator for enhanced security. | All |
| VNC & VNC Password | VNC (Virtual Network Computing) allows remote graphical access to a VPS. With VNC, users can connect to and control their VPS desktop environment from a remote location, enabling visual interaction and management of the virtual server. | All (except LXC and Proxmox LXC) |
| Enable Demo | Enabling the demo mode allows you to create a trial VPS for users with a time-limited access. Once the designated time period expires, the VPS is automatically deleted/suspended based on the action selected. | All |
Network
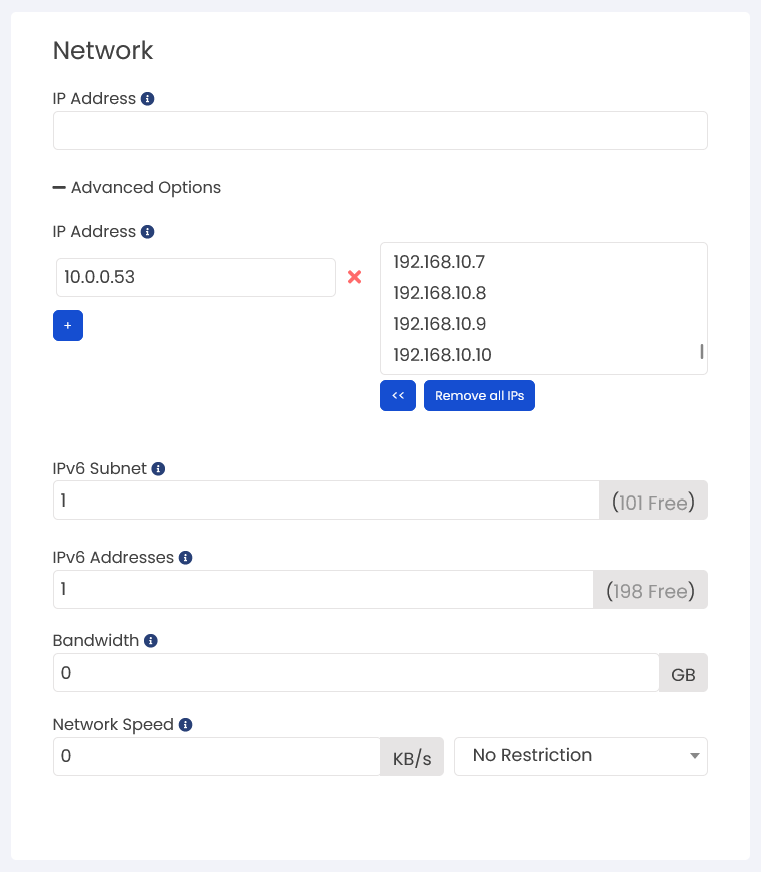
| Name | Description | Supported Virtualization |
| IP Address | In the 1st Ip Address text field you can set the count of the IP address for that VPS or choose from the list below that option. | All |
| IPV6 Subnet & IPV6 Address | In IPV6 we can select the number of IPV6 subnets and IPV6 address to assign to that VPS | All |
| Bandwidth | Bandwidth refers to the amount of data that can be transmitted between a VPS and the internet within a specific timeframe. It determines the capacity of data transfer for the VPS. | All |
| Network Speed | Network speed refers to the rate at which data can be transmitted over a network connection. It determines the speed and responsiveness of online activities, such as browsing, file transfers, and streaming, for a VPS. | All |
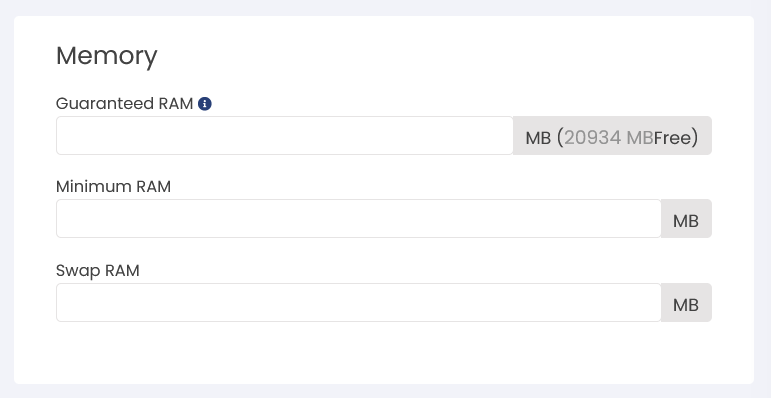
| Name | Description | Supported Virtualization |
| Guaranteed RAM | set the ram of VPS which the VPS will always have | All |
| Swap Ram | Swap RAM, also known as swap space or virtual memory, is a mechanism used by VPS systems to extend the available memory capacity. It will use the space assigned to the VPS for swap allocation within VPS. | All |
| Minimum Ram | minimum RAM the VPS should be using when ballooning is ON | Proxmox KVm |
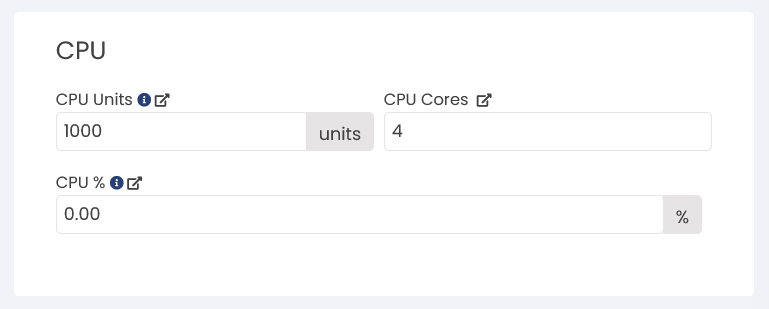
| Name | Description | Supported Virtualization |
| CPU units | This is just a weight assigned to the VPS. Lets say there are two VPS with different weights. e.g. VPS 101 with 1000 and VPS 102 with 2000. Now when the physical CPU is being utilized to the fullest, the priority of CPU resources to be assigned to each VM is decided by the CPU Units. Hence of all the CPU Time / Resources available, VPS 101 will get 1/3rd = 1000 / (1000 + 2000) and VPS 102 will get 2/3rd = 2000 / (1000 + 2000) of the CPU resources. | All |
| CPU Cores | This is rather simple to understand. The number of Virtual Cores to be assigned to the VPS. | All |
| CPU % | CPU % : Depending on the number of cores assigned, this is the maximum percentage the VPS can use of the physical core. Lets say your Physical CPU is having 4 cores. If you assign 4 cores to a VPS and set a CPU % of 400% then the VPS will be allowed to use all cores to its 100%. KVM : CPU% in case of KVM is the limit of the each core that can be utilized on the server. | All |
Example for KVM :
Core(s) to utilize on server (÷) total core(s) allocated to VPS x 100 = CPU% value.
Example 1 : If you've KVM VPS with 4 cores and you want it to utilize only 2 cores on the host server , then you can set the CPU% value as 50.
2 ÷ 4 x 100 = 50 (CPU%)
Example 2 : If you've a KVM VPS with 4 cores and you want it to utilize only 1 core on the host server , you can set the CPU% as 25.
1 ÷ 4 x 100 = 25 (CPU%)
Note : Each CPU core represents 100% of one physical core. This behavior may be different as per the base OS as well.
| Name | Description | Supported Virtualization |
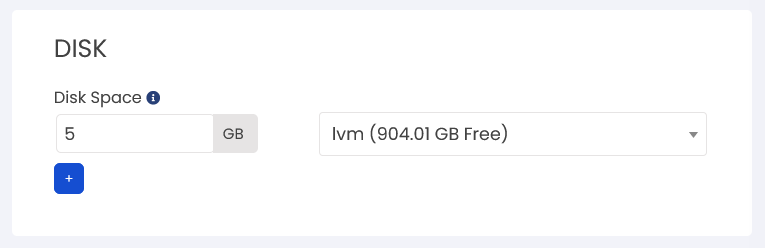
| Disk Space | In VPS systems, there are different disk storage options: 1. Thin: Efficient storage allocation, dynamically allocating disk space as needed. 2. LVM (Logical Volume Manager): Advanced disk management with features like resizing and snapshots. 3. Raw: Direct disk access without additional layers or filesystems. 4. File: VPS disk stored as a regular file, offering simplicity and portability. The choice depends on factors like storage efficiency, management capabilities, and specific use cases for the VPS. | All |
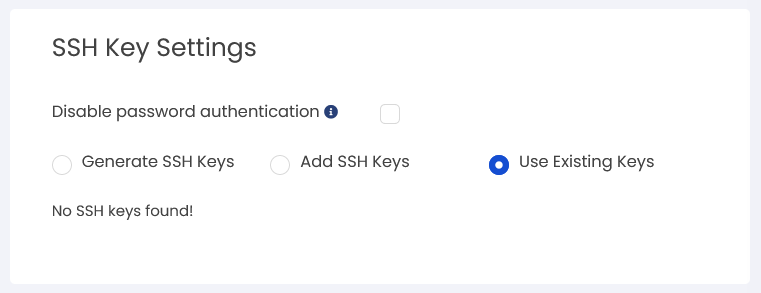
| Name | Description | Supported Virtualization |
| Disable password authentication | If we check it then its restrict the password login to the VPS | All |
| Generate SSH Keys | with the help of Generate SSH Keys we can Generate the SSH key | All |
| Add SSH Key | we can add SSH key for SSH Login | All |
| Use Existing Keys | we can use already exisiting keys in the panel for ssh login to the VPS | Lorem ipsum |
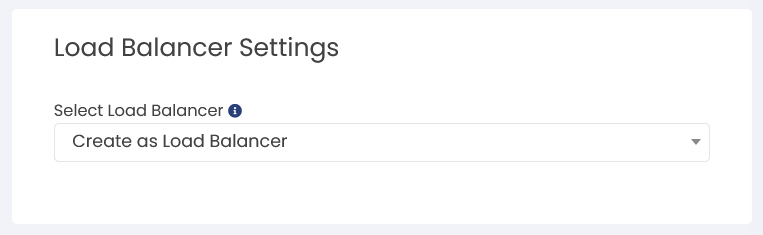
| Name | Description | Supported Virtualization |
| Select Load Balancer | in Select load balancer you cna assign the load balancer at the time of VPS creation Or we can create that VPS as a load balancer. | All |
Network Settings
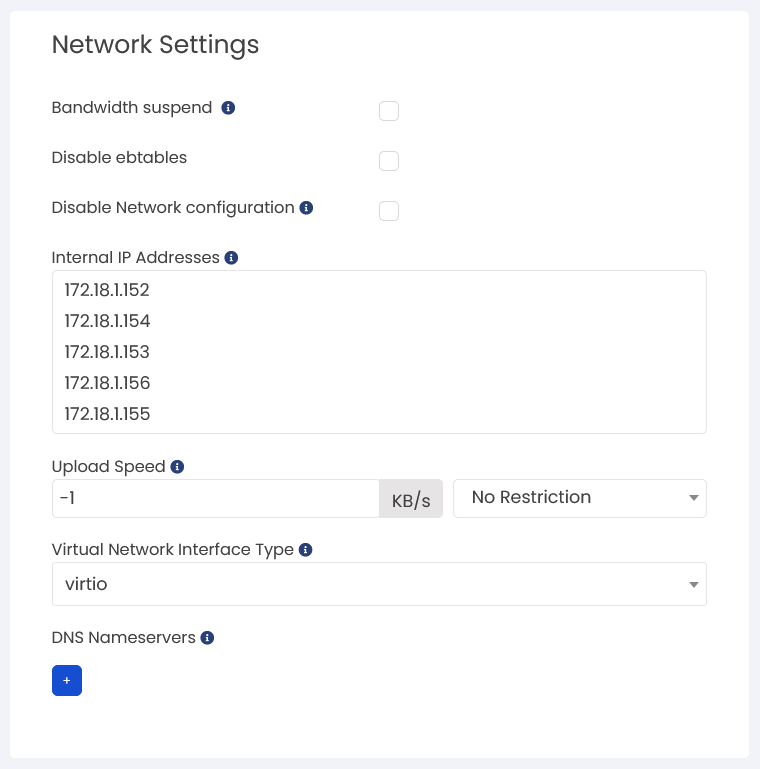
| Suspend the VPS if it is uses more than specified bandwidth | All | |
| Disable ebtables | Lorem ipsum | All |
| Disable Network configuration | If checked, Virtualizor will not configure/re-write network when a VPS is rebooted. However, during creation of the VPS, the network file will be written. | All |
| Internal IP Addresses | you can select the internal IP address from the range of internal IP'S | All |
| Upload Speed | This will be the Upload speed of the VPS. Specifying -1 as Upload speed will be same as that of Download speed. | All |
| Virtual Network Interface Type | If you want to change the network interface type. Options are default or E1000. virtio will be used as the virtual nic type if virtio is enabled | All |
| DNS nameservers | Lorem ipsumIt allows the VM to resolve and access resources on the internet or within the local network by converting human-readable domain names (like, www.Virtualizor.com) into machine-readable IP addresses (like, 192.168.10.10). | All |
DISK
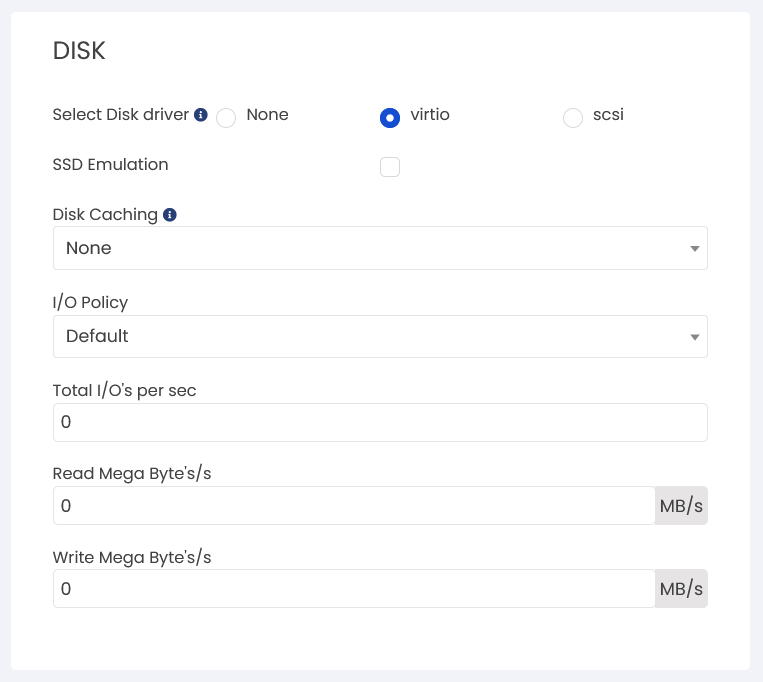
| Name | Description | Supported Virtualization |
| Select Disk Driver | The disk driver in a virtual machine (VM) enables communication between the VM's operating system and its virtual disks. | All |
| SSD Emulation | By emulating SSDs, VPS(s)can benefit from enhanced performance and responsiveness, even if the underlying physical storage is not an actual SSD. This improves resource utilization and user experience in virtualized environments. | All |
| I/O Policy | Default: Balanced performance and compatibility. Native: Best performance, direct access to physical devices.Thread: Improved performance with dedicated I/O handling thread | All |
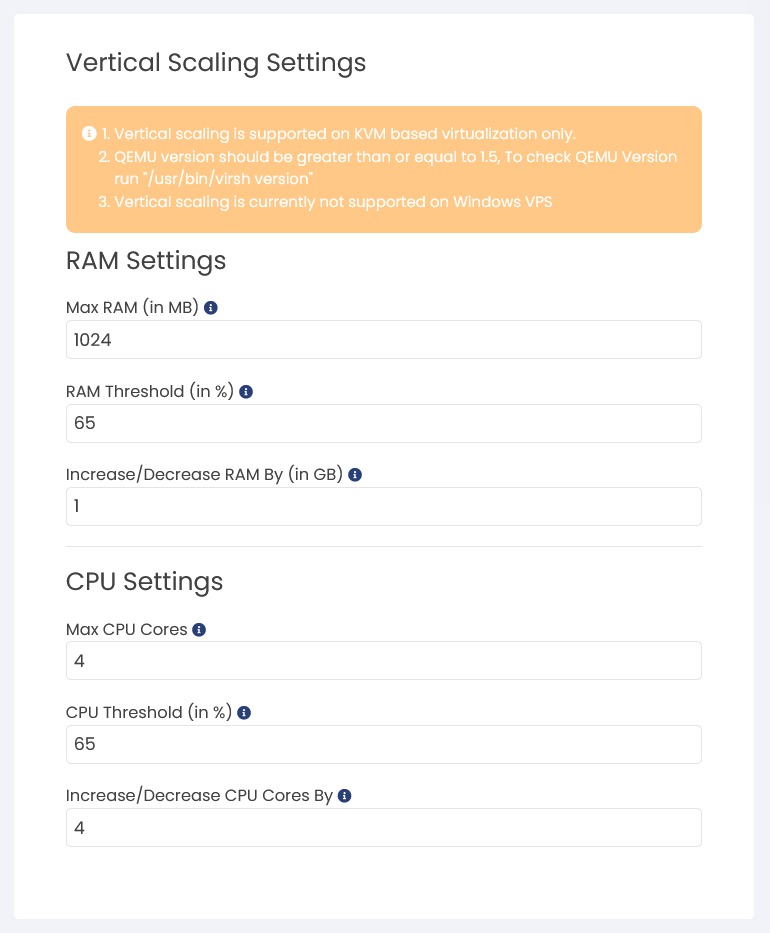
| Name | Description | Supported Virtualization |
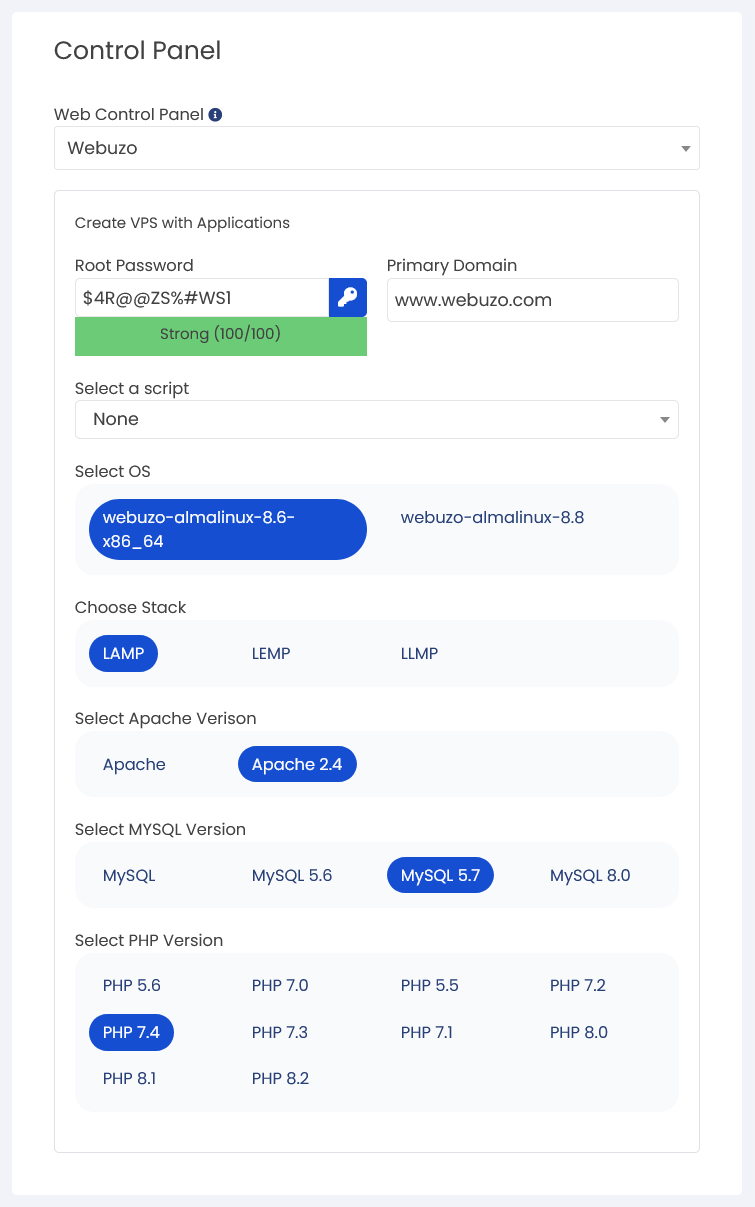
| Vertical Scaling | Vertical Scaling is a valuable feature that allows Virtual Private Servers (VPS) to automatically adjust their resources based on defined thresholds. This ensures optimal performance during peak loads by dynamically scaling RAM and CPU cores. Administrators or users can easily configure maximum limits, thresholds, and resource allocation changes on a per-VPS basis. Vertical Scaling guarantees that your VPS maintains efficiency and responsiveness, even during high-demand periods. (This feature is available for KVM only ) | All |
| Name | Description | Supported Virtualization |
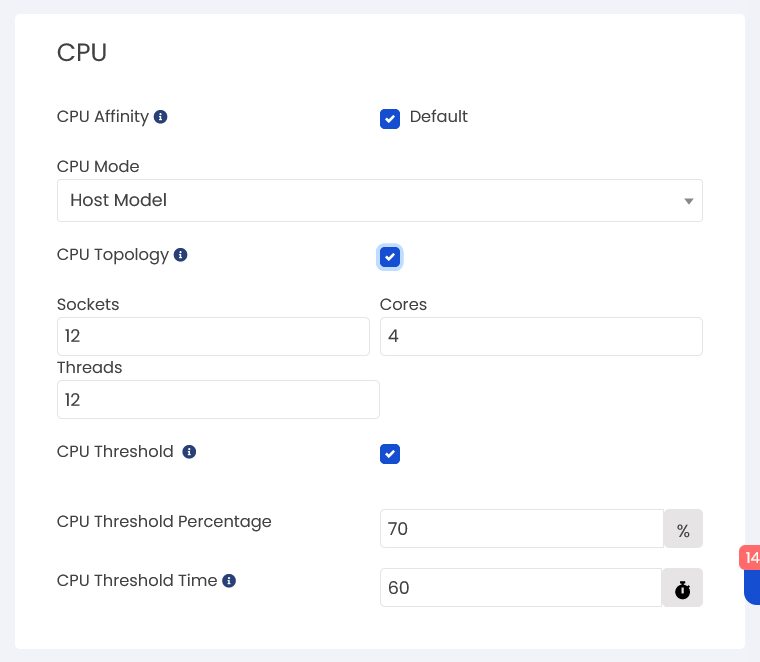
| CPU Affinity | Pin the particular CPU Cores to this VPS. You can choose multiple CPU Cores. | All |
| CPU modes | Predefined CPU modes in virtualization enable administrators to specify the desired CPU feature sets for virtual machines. These modes define the level of compatibility and performance between the virtual CPUs and the underlying physical CPUs. By selecting an appropriate CPU mode, administrators can optimize the balance between compatibility and performance for their virtualized workloads. | KVM, Proxmox KVM |
| CPU Topology | CPU topology in virtualization refers to aligning virtual CPUs (vCPUs) with the physical CPU architecture to optimize performance and resource utilization in virtual machines (VMs). It ensures efficient communication, cache locality, and utilization of computing resources. | KVM, Proxmox KVM, XCP |
| CPU Threshold | A CPU Threshold is a preconfigured level of CPU utilization that helps monitor the CPU usage of a virtual machine (VM). It enables administrators to set a limit for CPU usage on a server. With Virtualizor, you can establish a time limit for exceeding CPU usage, and the system will watch for and notify you about any VPS (Virtual Private Server) that surpasses the designated threshold. In such cases, Virtualizor provides the option to suspend the VPS temporarily. The calculation of CPU usage may vary depending on factors like the number of CPU cores and the assigned CPU %, which can be adjusted based on your specific requirements. This feature allows for effective management and control of CPU resources within the virtualization environment. | ALL |
Miscellaneous Settings
| Name | Description | Supported Virtualization |
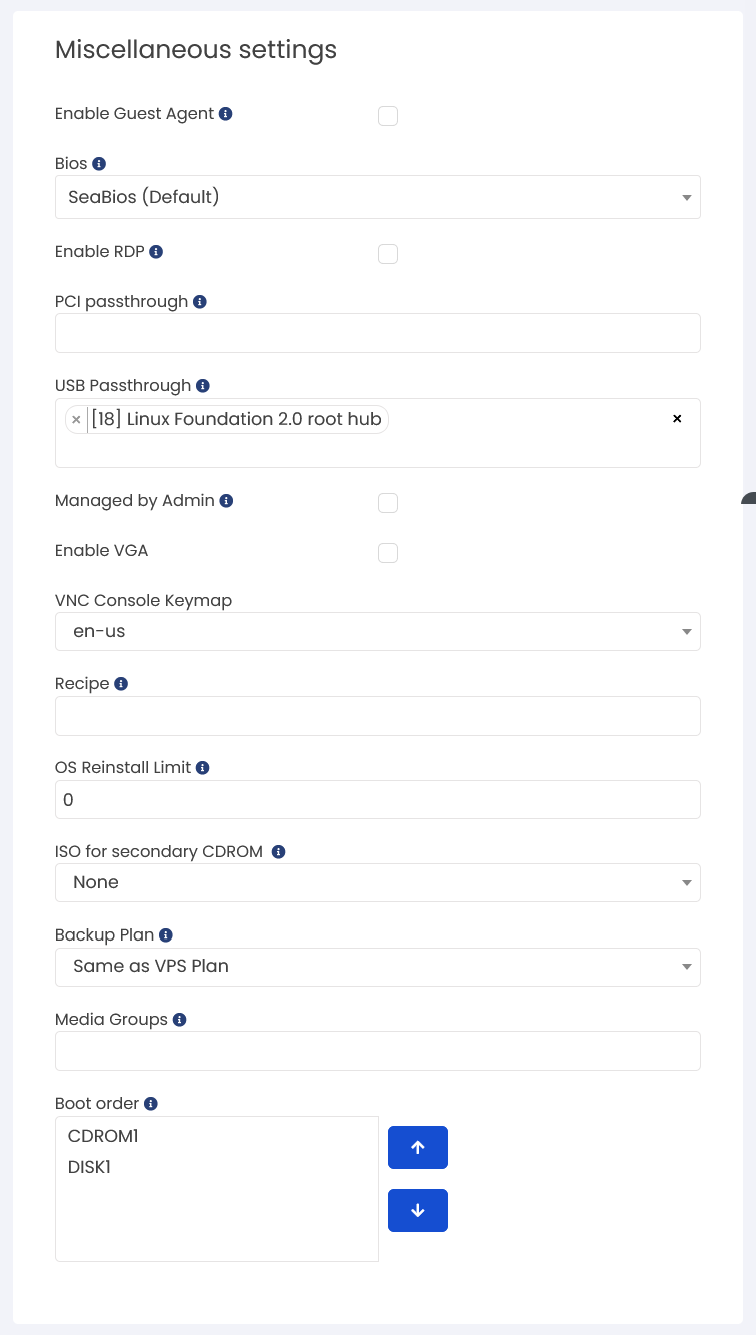
| Enabled Guest Agent | If enabled, then few operations like password change, fetch ram and disk actual usage can be done on live machine. NOTE: Enable this option if you have a secure envoironment | All |
| Bios | A VPS BIOS controls the booting process of a virtual private server(VPS), similar to a physical computer's BIOS. It manages the boot order and input/output operations within the VM. | All |
| Enable RDP | Enable Remote Desktop Connection (For Windows VPS) | KVM, Proxmox KVM, XCP |
| PCI passthrough | This allows a VPS to have exclusive access to the PCI device | KVM |
| USB passthrough | This allows a VPS to have exclusive access to the USB device | KVM |
| Managed by admin | If checked, VPS can not be managed from Enduser Panel. | All |
| Enabled VGA | The video element in virtualization defines video devices for a virtual machine. Support resolutions 1280 X 1024 X 16 and newer which have a built in driver. Additional settings like video memory and acceleration options can be configured. | All |
| VNC Console Keymap | KeyMaps are the Keyboard language layout for the VNC console. When you operate any VPS through VNC then automatically United States (EN) keyboard layout is assigned to the VNC. Users can now change the layout with the option available in VPS creation and editing process. | All |
| Reciped | Recipes are predefined bash scripts. Admin can create those scripts for Endusers. from options and then select here to add inside the vps | All |
| OS Reinstall limit | Control the OD reinstallation limit for the vps from enduser side if we want to give the limitations for the installation cycle | All |
| ISO for secondary CDROM | Secondary CD-ROM is useful when you need to install any driver or any third party application in your VPS through CD/DVD. This feature allows you to attach the secondary CD-ROM to your existing VPS or newly created VPS. After assigning it, you will get another drive with the CD/DVD mounted in your VPS. | All |
| Backup Plan | Backup plans enable you to create different VPS backup settings for different VPS on the same server(s). You can assign backup plans to individual VPS or to the entire VPS plan. | All |
| Media Groups | Media groups allow the admin to manage the ISOs / OS templates which are used for creating Virtual Private Servers. You can group multiple ISOs in a single media group and assign that media group to particular enduser, ensuring that the enduser has access to only those ISOs for creating Virtual Private Servers. | All |
| Name | Description | Supported Virtualization |
| Enabled Guest Agent | If enabled, then few operations like password change, fetch ram and disk actual usage can be done on live machine. NOTE: Enable this option if you have a secure envoironment | All |
| Bios | A VPS BIOS controls the booting process of a virtual private server(VPS), similar to a physical computer's BIOS. It manages the boot order and input/output operations within the VM. | All |
| Enable RDP | Enable Remote Desktop Connection (For Windows VPS) | KVM, Proxmox KVM, XCP |
| PCI passthrough | This allows a VPS to have exclusive access to the PCI device | KVM |
| USB passthrough | This allows a VPS to have exclusive access to the USB device | KVM |
| Managed by admin | If checked, VPS can not be managed from Enduser Panel. | All |
| Enabled VGA | The video element in virtualization defines video devices for a virtual machine. Support resolutions 1280 X 1024 X 16 and newer which have a built in driver. Additional settings like video memory and acceleration options can be configured. | All |
| VNC Console Keymap | KeyMaps are the Keyboard language layout for the VNC console. When you operate any VPS through VNC then automatically United States (EN) keyboard layout is assigned to the VNC. Users can now change the layout with the option available in VPS creation and editing process. | All |
| Reciped | Recipes are predefined bash scripts. Admin can create those scripts for Endusers. from options and then select here to add inside the vps | All |
| OS Reinstall limit | Control the OD reinstallation limit for the vps from enduser side if we want to give the limitations for the installation cycle | All |
| ISO for secondary CDROM | Secondary CD-ROM is useful when you need to install any driver or any third party application in your VPS through CD/DVD. This feature allows you to attach the secondary CD-ROM to your existing VPS or newly created VPS. After assigning it, you will get another drive with the CD/DVD mounted in your VPS. | All |
| Backup Plan | Backup plans enable you to create different VPS backup settings for different VPS on the same server(s). You can assign backup plans to individual VPS or to the entire VPS plan. | All |
| Media Groups | Media groups allow the admin to manage the ISOs / OS templates which are used for creating Virtual Private Servers. You can group multiple ISOs in a single media group and assign that media group to particular enduser, ensuring that the enduser has access to only those ISOs for creating Virtual Private Servers. | All |
NOTE: If you are creating VPS using an Windows ISO, you will need to remove the system reserved partition manually after VPS creation and then ONLY Virtualizor will be able to perform operations like Change password and enabling RDP.
Here is the link for how to remove System reserved Partition for windows VPS :
Remove system Reserved partition
Related Articles
VM Power Management
KB: Virtual Machine Power Operations Platform: vCloud Infrastructure Portal URL: vcloud.officeinfra.com:4085 Purpose This document explains the procedures for starting, stopping, restarting, force stopping, and power cycling a Virtual Machine (VM), ...VM Resource Management
KB: VM Resource Upgrade Procedure (vCPU, RAM & Disk) Platform: vCloud Infrastructure Portal URL: vcloud.officeinfra.com:4085 Purpose This document explains the procedure to upgrade Virtual Machine CPU, Memory, and Disk resources, extend operating ...